9.25

Due Today: P2 Phase II Process Work: mind map, 2–3 format dummies, 20+ thumb sketches, 10+ type trials combinations; started reading ch.6+8

For Today:

  • Lecture: Type & Typography
  • Small group crits on mind map, format dummies, thumbnails, type trials
  • Studio for P2 First Finish: After the initial group critique, begin to build in InDesign using the provided text and imagery of your choice.
ch7_TypeTypography_f18
Today’s Resources
Due Next Class
  • Phase III Initial Design (first finish critique): Layout your menu in InDesign and Print in full color actual size (on the laser printer). Trim, fold and bring to class for first finish critique.
  • Continue reading Ch 6 & 8 in Santoro Text.

Project 2 Timeline:

  • 9.25 – Due: Phase II (mind map, format dummies, thumbnails, type trials); Lecture: Type & Typography
  • 9.27 – Due: Phase III Initial Design (first finish critique)
  • 10.2 – Final Design (Final critique); Begin P3
  • 10.4 – Project 3
  • 10.09 – Reading Day
  • 10.11 – SUBMIT P2 (final presentation); Progress on P3
9.20

Due Today: 3 Layouts (printed and trimmed) for P2 Warmup; Ch.7 completed; P2 Phase I Initial Research

For Today: P2 warmup critique; Read:The Psychology of Menu Design; Small group discussions on restaurant concepts; Studio for P2

Today’s Resources
Due Next Class
  • P2 Phase II (Bring all of the above to class for an initial critique):
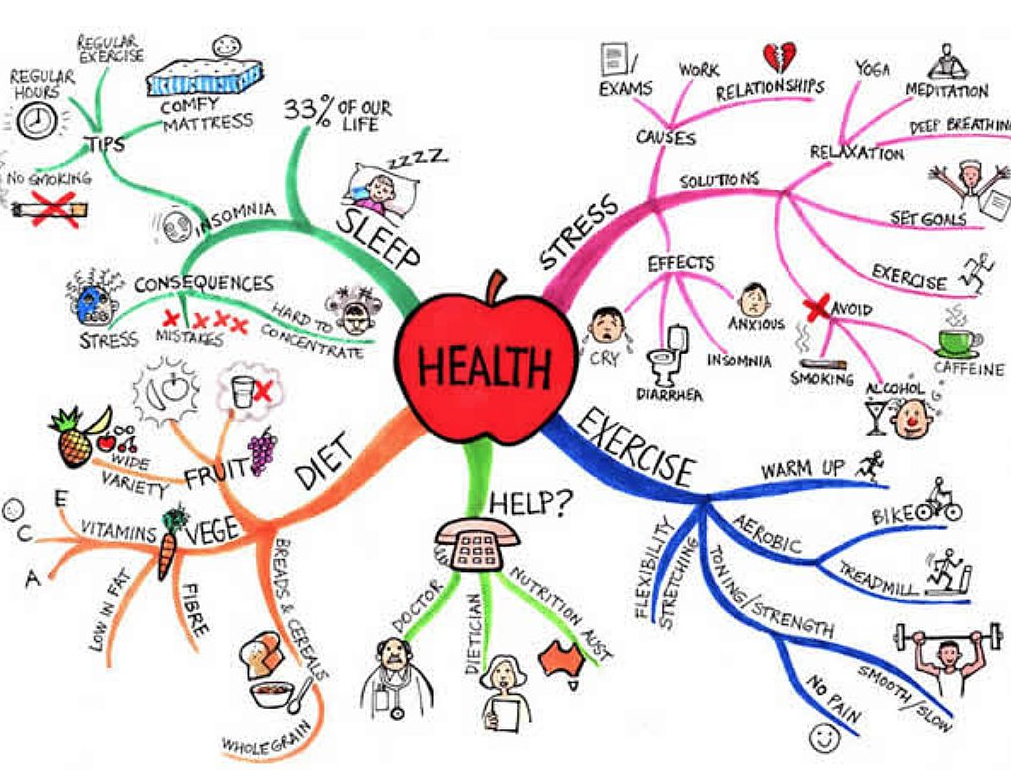
    • mind map: Begin by brainstorming and creating a mind map for your chosen restaurant. It may also help you to select your final name for your restaurant. Create by hand from your central ideal for your restaurant. Color + images are not required, but can help visual exploration.

      http://www.tonybuzan.com/gallery/mind-maps/
    • format dummies: Using plain paper, construct a number of format “dummies” to help you. A format dummy is a blank piece of copy paper trimmed, folded, or bound to the specifications you desire for your final Project 2. So, if your final menu is going to be a trifold or booklet, you would make a dummy of how that would be assembled. If you are using a single sheet of paper front and back, then you need to bring in the paper trimmed to the size you are considering.
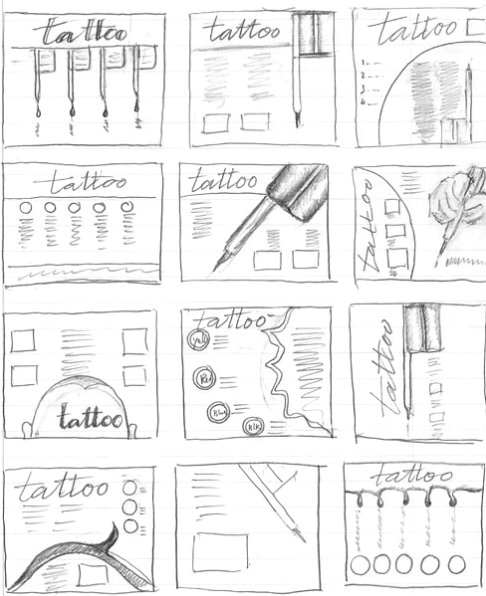
    • thumbnails: Explore thumbnails in your process book. 20+ menu layout sketches.

      https://zartnerds.wordpress.com/2016/09/23/introducing-the-thumbnail/
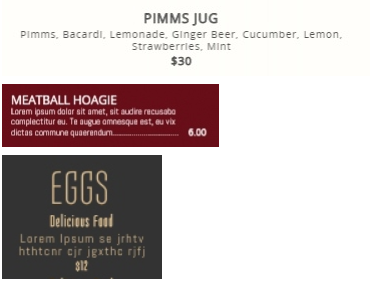
    • type trials: Create type trials (in InDesign) using sections of the text provided with a name for your restaurant. 10+ typeface combinations of item name, description, & price. The type trials are laying out one menu item using 10 different typeface combinations (use the same copy for each combination and below each note the typeface names) Print.
  • Watch: Designer Profile Video: Interview with Paul Shaw
  • Closer Look: Tailor Typeface
  • Closer Look: Template Gothic
  • Begin reading Ch. 6 – The Elements & Principles of Form and Ch. 8 – Grids
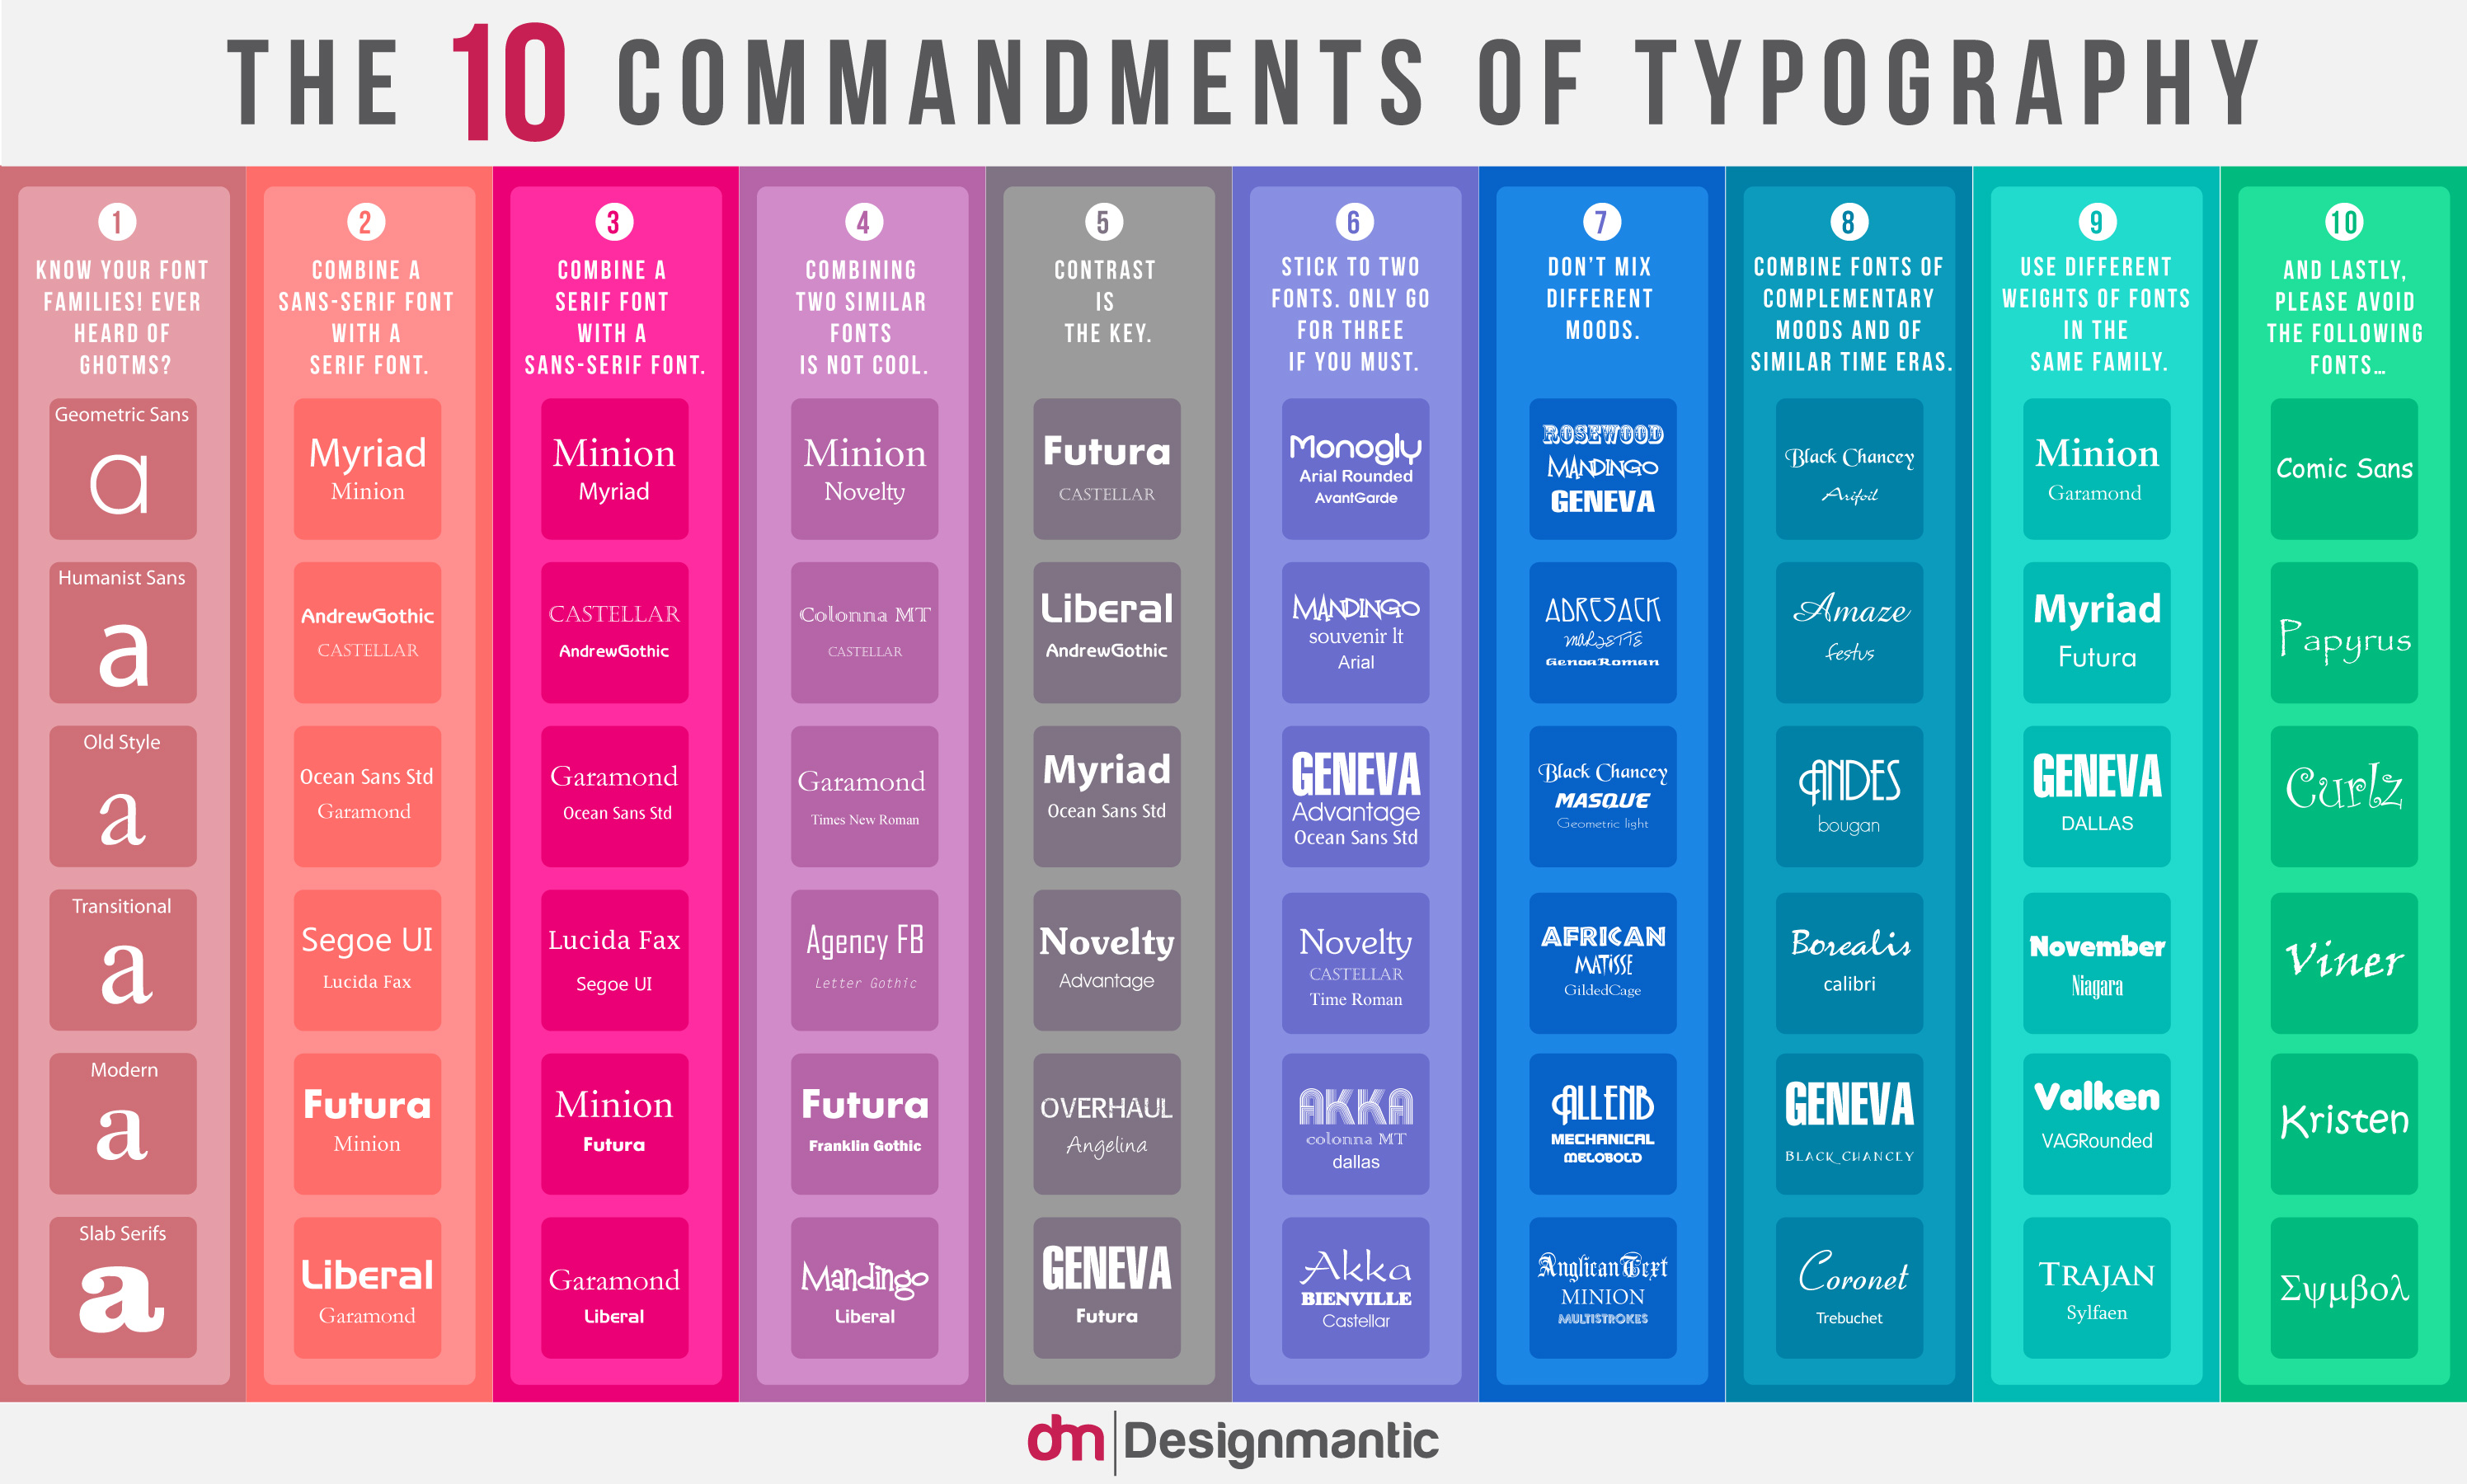
https://www.designmantic.com/blog/wp-content/uploads/2014/04/font-infography.jpg
InDesign Tutorial PDF Documents (for your reference)

Project 2 Timeline:

  • 9.20 – Warmup Crit
  • 9.25 – Due: Phase II (mind map, format dummies, thumbnails, type trials); Lecture: Type & Typography
  • 9.27 – Due: Phase III Initial Design (first finish critique)
  • 10.2 – Final Design (Final critique); Begin P3
  • 10.4 – Project 3
  • 10.09 – Reading Day
  • 10.11 – SUBMIT P2 (final presentation); Progress on P3

9.18

Due Today: SUBMIT P1

For Today: Final P1 Presentations;  P2 Warmup Exercise (use your own image or stock image); InDesign Overview Demo; Studio

Warmup: Design three distinctly different, visually compelling layouts in InDesign, using the same (provided) text and image in each layout. 

Layout 1: Focus on typographic hierarchy. Use a letter format (8.5" x 11") horizontally or vertically. 

Layout 2: Create an internal relationship between type and image. Use a letter format (8.5" x 11") horizontally or vertically. 

Layout 3: Create a layout that is type-dominant on a grid system (axial relationships).The format is your choice. 

Consider design principles: balance, contrast, direction, dominance, proportion, rhythm, unity. Consider how to create contrast: figure/ground, large/small, texture/mass, stable/unstable, bold/light, static/moving, rectilinear/curvilinear, hard/soft, etc.

Print (AND TRIM!) all three layouts for critique. Revise and print final layouts.
Today’s Resources
Due Next Class
  • P2 Warmup Exercise – printed and ready for critique
  • Finish reading Ch. 7
  • Complete P2 Initial Research: 20 brainstormed names; descriptive words;  Research menu design online as well as in person. Many restaurants will allow you to take a menu home. When conducting your online research, you will see sites that offer templates for menu design… avoid them! Indicate in your process book what inspires you while you research professional menu design. Is it color? layout? imagery? typestyle? format?

Project 2 Timeline:

  • 9.18 – Warmup Exercise; Final P1 Presentations; InDesign Demo
  • 9.20 – Warmup Crit
  • 9.25 – Due: Phase II (mind map, format dummies, thumbnails, type trials); Lecture: Type & Typography
  • 9.27 – Due: Phase III Initial Design (first finish critique)
  • 10.2 – Final Design (Final critique); Begin P3
  • 10.4 – Project 3
  • 10.09 – Reading Day
  • 10.11 – SUBMIT P2 (final presentation); Progress on P3
9.13

Due Today: 3 printed comps – 8.5″ x 11″ and 12 roughs for critique

For Today: Full Class Critique; Begin P2: Menu; Restaurant Menu Content

Critique Considerations:
  1. Formal Considerations: color palette, type choice and readability, imagery, simplicity (is there anything there that doesn’t need to be? is there anything missing?)
  2. Concept: creates new understanding of “graphic design,” pushes beyond expectations, unexpected connections, humor, emotion, cleverness, originality
  3. Communication: Is the intended message clear?
Due Next Class
  • SUBMIT P1; Demo: InDesign
    • In thin pocket folder include (in this order): filled out self evaluation, project sheet, 100 ideas typed out, thumbnail sketches (can include photos of sketches if you don’t wish to tear from sketchbook), roughs, and 3 comps. Three-hole punch everything that is process related include the 3 comps for critique. Final designs should not be three-hole punched (do not bind) and included inside the front pocket on your pocket folder.
    • 3 Final Designs: printed in color at 8.5″ x 8.5″ trimmed on matte presentation paper or a heavier weight cardstock. Final designs should be mocked up on include t-shirt mockup file.
  • Select Restaurant Menu Content (from 3 choices) and begin brainstorming ideas for restaurant name, the brand (overall feeling), and style.

Project 2 Timeline:

  • 9.18 – Warmup Exercise; Final P1 Presentations; InDesign Demo
  • 9.20 – Warmup Crit
  • 9.25 – Due: Phase II (mind map, format dummies, thumbnails, type trials); Lecture: Type & Typography
  • 9.27 – Due: Phase III Initial Design (first finish critique)
  • 10.2 – Final Design (Final critique); Begin P3
  • 10.4 – Project 3
  • 10.09 – Reading Day
  • 10.11 – SUBMIT P2 (final presentation); Progress on P3
9.11

Due Today: 12 roughs, Read Ch.5

For Today: Review P1 Self-Evaluation; Critique Discussion; Small Group Critiques; Studio

Today’s Resources
Due Next Class
  • 3 comps: Digitally rendered and mocked up on t-shirt. Printed in color for full-class critique.
  • Read Today’s Resources (above).

Project 1 Timeline:

  • 9.13 – Due: 3 comps; Critique of 12 roughs and 3 comps printed on t-shirt template; Begin P2
  • 9.18 – SUBMIT P1; Demo: InDesign
    • In thin pocket folder include (in this order): filled out self evaluation, project sheet, 100 ideas typed out, thumbnail sketches (can include photos of sketches if you don’t wish to tear from sketchbook), roughs, and 3 comps. Three-hole punch everything that is process related include the 3 comps for critique. Final designs should not be three-hole punched (do not bind) and included inside the front pocket on your pocket folder.
    • 3 Final Designs: printed in color at 8.5″ x 8.5″ trimmed on matte presentation paper or a heavier weight cardstock. Final designs should be mocked up on include t-shirt mockup file.


9.6

Due Today: 75 thumbnail sketches, Begin reading Ch. 5

For Today: Software Demo: T-shirt template in PS, Image Trace and Live Paint in AI, Color Guide; Lecture: Graphic Design Process; Studio for P1

Today’s Resources
Due Next Class
  • P1 12 roughs: More detailed sketches, larger scale (usually done at full size), may include color but not required (use template provided in demo files above)
  • Finish reading Ch. 5

Project 1 Timeline:

  • 9.6 – Due: 75 thumbs; Software Demo: T-shirt template in PS, Image Trace and Live Pain in AI, Color Guide
  • 9.11 – Due: 12 roughs
  • 9.13 – Due: 3 comps; Critique of 12 roughs and 3 comps printed on t-shirt template; Begin P2
  • 9.18 – SUBMIT P1; Demo: InDesign
    • In thin pocket folder include (in this order): filled out self evaluation, project sheet, 100 ideas typed out, thumbnail sketches (can include photos of sketches if you don’t wish to tear from sketchbook), roughs, and 3 comps. Three-hole punch everything that is process related include the 3 comps for critique. Final designs should not be three-hole punched (do not bind) and included inside the front pocket on your pocket folder.
    • 3 Final Designs: printed in color at 8.5″ x 8.5″ trimmed on matte presentation paper or a heavier weight cardstock. Final designs should be mocked up on include t-shirt mockup file.


9.4

Due Today: Charette Presentations; P1 – 100 brainstorming items list (typed and printed); Ch.1 reading complete

For Today: 

ch1_intro_to_Graphic_Design
Today’s Resources
Due Next Class
  • P1 75 thumbnail sketches: Explore a minimum of 25 different ideas over all of the sketches. Feel free to use this template for sketching. Printing 5 copies allows for 80 t-shirt thumbs.
  • Begin reading Ch. 5
  • Review Today’s Resources

Project 1 Timeline:

  • 9.4 – Due: P1 Phase 1 + Design Charrette Presentations
  • 9.6 – Due: 75 thumbs; Software Demo: T-shirt template in PS, Image Trace and Live Pain in AI, Color Guide
  • 9.11 – Due: 12 roughs
  • 9.13 – Due: 3 comps; Critique of 12 roughs and 3 comps printed on t-shirt template; Begin P2
  • 9.18 – SUBMIT P1; Demo: InDesign
    • In thin pocket folder include (in this order): filled out self evaluation, project sheet, 100 ideas typed out, thumbnail sketches (can include photos of sketches if you don’t wish to tear from sketchbook), roughs, and 3 comps. Three-hole punch everything that is process related include the 3 comps for critique. Final designs should not be three-hole punched (do not bind) and included inside the front pocket on your pocket folder.
    • 3 Final Designs: printed in color at 8.5″ x 8.5″ trimmed on matte presentation paper or a heavier weight cardstock. Final designs should be mocked up on include t-shirt mockup file.


8.30

Due Today: P1 Warmup Exercise

For Today: 

ch1_intro_to_Graphic_Design
Due Next Class
  • Design Charette Due Next Class
  • P1 Phase 1: Brainstorming: Explore the purpose of Graphic Design, and brainstorm 100 ideas of what Graphic Design is or does, or means to you. Example: Graphic Design can help save lives. Graphic Design is…, Graphic Design is like a…, Graphic Design can… or just implied. The text must include the words Graphic Design. Research what Graphic Design is via your text, library, or the Internet. Research should inform your conceptual solution.Type the list of 100 ideas on 8.5 x 11 paper with your name centered at the top followed by Graphic Design is…, number list 1-100 and bind in your pocket folder, bring to class.
    Hint: Discovery is easier than invention. Ideas in their completed form do not just fall from the sky above. You must engage the process to uncover the “not yet realized.” Embrace unexpected results! 
  • Finish reading Ch. 1.

Project 1 Timeline:

  • 9.4 – Due: P1 Phase 1 + Design Charrette Presentations
  • 9.6 – Due: 75 thumbs; Software Demo: T-shirt template in PS, Image Trace and Live Pain in AI, Color Guide
  • 9.11 – Due: 12 roughs
  • 9.13 – Due: 3 comps; Critique of 12 roughs and 3 comps printed on t-shirt template; Begin P2
  • 9.18 – SUBMIT P1; Demo: InDesign
    • In thin pocket folder include (in this order): filled out self evaluation, project sheet, 100 ideas typed out, thumbnail sketches (can include photos of sketches if you don’t wish to tear from sketchbook), roughs, and 3 comps. Three-hole punch everything that is process related include the 3 comps for critique. Final designs should not be three-hole punched (do not bind) and included inside the front pocket on your pocket folder.
    • 3 Final Designs: printed in color at 8.5″ x 8.5″ trimmed on matte presentation paper or a heavier weight cardstock. Final designs should be mocked up on include t-shirt mockup file.


8.28

Welcome to Principles of Graphic Design. Below you will find some resources you may find helpful for the first day.

For Today: Course Introduction / Review: Principles of GD Syllabus F18, Complete Survey + Syllabus Agreement + Lab Email; Lecture: Intro to Graphic Design; Assign: P1: Graphic Design is.. T-Shirt

ch1_intro_to_Graphic_Design
Today’s Resources
For Next Class
  • Purchase textbook – Guide to Graphic Design

    | Scott W. Santoro | ISBN-13: 9780205253111

  • Read Ch. 1

  • Warmup Exercise: Research three examples of (what you think of as) good design. Print each large enough to see when posted in the classroom. Print each on its own (letter size) sheet of paper. On the back of the sheet, make a list of the reasons why you think it is successful. Then find three examples of bad design (print as indicated above) and again note why you think they are unsuccessful on the back of each sheet. Bring all six to next class, and prepare to defend your decisions. (note: do not search “good” or “bad” design on google…find your own examples in magazines, posters, branding, etc.). This isn’t about finding one “right” answer, but developing YOUR design “eye.”

Project 1 Timeline:

  • 9.4 – Due: P1 Phase 1 + Design Charrette Presentations
  • 9.6 – Due: 75 thumbs; Software Demo: T-shirt template in PS, Image Trace and Live Pain in AI, Color Guide
  • 9.11 – Due: 12 roughs
  • 9.13 – Due: 3 comps; Critique of 12 roughs and 3 comps printed on t-shirt template
  • 9.18 – SUBMIT P1; Demo: InDesign
    • In thin pocket folder include (in this order): filled out self evaluation, project sheet, 100 ideas typed out, thumbnail sketches (can include photos of sketches if you don’t wish to tear from sketchbook), roughs, and 3 comps. Three-hole punch everything that is process related include the 3 comps for critique. Final designs should not be three-hole punched (do not bind) and included inside the front pocket on your pocket folder.
    • 3 Final Designs: printed in color at 8.5″ x 8.5″ trimmed on matte presentation paper or a heavier weight cardstock. Final designs should be mocked up on include t-shirt mockup file.